
As many of you will have seen from my Instagram, around mid-September I bought a load of new kit. This new setup has been elevating my portrait photography game immensely, and allowed to me to effectively (and cheaply) build a professional photography studio anywhere!

This new setup has been elevating my portrait photography game immensely.
Kieran Gibb
So, I wanted to make a guide to my setup and share with you all the (relatively budget!) equipment I use, to help you take your portrait photography to the next level, and set up your own cheap, but professional studio-style shoots.
I’ve also provided links to buy all the kit on Amazon, so you don’t have to do the hard work of finding it yourself!
Jump to Amazon Store links:
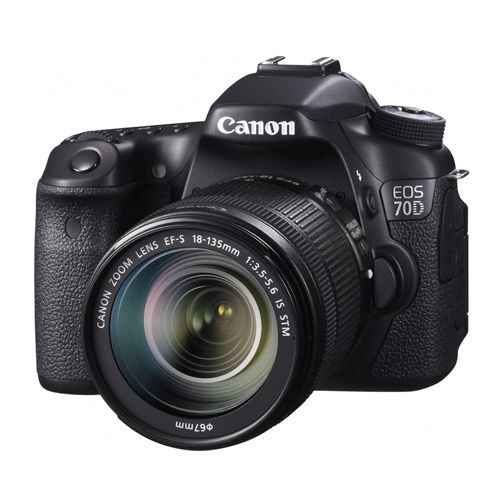
Canon 70D Body
Canon 50mm F1.8 STM Lens
Godox TT600 Speedlite Flash Kit
Godox Softbox Kit
My “Go-To” Choice of Camera
We should probably start a photography setup guide with the piece of equipment at the centre of it all: the camera, right?
I am currently using a 2013 Canon EOS 70D. It’s not part of Canon’s top-line of professional cameras, and sits in the mid-range of their camera models.

Then why did I buy this camera?
It’s cheap, but brilliant.
And as you all know, I am a total budget photographer and pride myself on my ability to find fantastic budget equipment to get professional-looking photographs.
The camera shoots up to 20.2 megapixels on its impressive 14-bit Digic 5+ sensor (and if all this jargon means nothing to you, it’s sensor means you’re capturing some really high-resolution, detailed images).
The brand of camera you choose is entirely down to personal preference, and you’ll find that each brand has its distinct characteristics. I like Canon because their images always look super clean, not overly sharp and contrasted, and have more “orangey” warm colour tones.
Another thing I really like about Canon cameras are how adaptive the EF-mount is. With all the lenses from Canon’s EF line able to be used on both EF- and EF-S-Mount bodies, there are hundreds- maybe even thousands of combinations to use in your photography setup.
This is particularly good for photographers like me, who are using both film and digital photography, because using an EF-mount Canon SLR like my Canon EOS7 can share lenses with the Canon EOS70D! (Saving you tons of money on buying multiple lenses for multiple cameras!)
Which, brings me to…
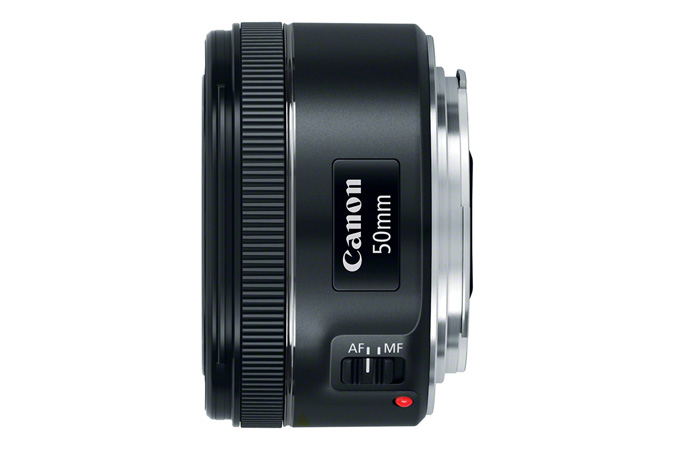
My Portrait Photography Lens
As I mentioned before, I’m a total budget photographer. With some lenses costing almost as much as the camera itself, they can take up a huge part of your photography equipment budget.
But, what if I told you that the lens I’m using is actually one of the cheapest pieces of equipment in my camera bag? I actually wrote an entire article about this miracle lens, that’s giving me gorgeous bokeh for professional-looking photos at a super low-budget price!
Introducing the Canon EF-mount 50mm F1.8 STM. Now, as I said, I’ve written an extensive review of the lens in a separate blog article, so if you want to read more I suggest you have a read there. But I will summarize my thoughts here too.
Best value-for-bokeh
This lens is the cheapest option to get that highly desirable bokeh effect, with its F-stop (aperture width) going all the way down to F/1.8. This is usually the effect that makes your photography look so much better and professional. And if you’re lucky, you might find this lens for as little HK$800 second-hand! Not a lot to complain about here!
Why 50mm?
I didn’t just get this lens because it’s cheap, you know! There’s a reason why I use this lens in my portrait photography setup,other than it just being very cheap and having a wide aperture.
Portraiture classically looks best between 50-80mm focal length lenses, and that’s largely because this focal length range is most similar to that of the human eye, so your portrait shots on these lenses will look most similar to what your subject looks like to your own eye.
So, a 50mm lens is going to look good for portraiture already, not to mention the versatility of this focal length. I wrote about this in my blog article on this lens, but if you now take this 50mm EF-mount lens and put it on an APS-C EF-S-mount camera body (like the EOS70D), you’re going to end up with an effective 80mm lens.
Perfect lens for portraiture, don’t you agree?

Portrait Photography Flash Equipment
Many of you who follow me on Instagram will know that only a few weeks before writing this article, I invested in a load of new flash equipment. Being the budget photographer I am, I didn’t spend big on this equipment either!
I’m currently using a wireless flash setup to keep me free to move around with the camera, and without any need to tether myself up to all the other equipment.
To achieve this, I’m using two Godox TT600 wireless strobe flashes as slaves which are triggered remotely by a Godox X1T-F mounted to the hotshoe on the top of my camera.
Get this flash set:
These two flashes and wireless transmitter are available as a kit!
Godox 2X TT600 Flash Speedlite with Godox X1T-C Transmitter for Canon
These TT600s are manual flash strobes, meaning they alone do not allow for TTL (through-the-lens) metering. I personally don’t mind this, and like having the extra control of setting my flashes manually anyway, so it’s not worth paying the large price difference for a flash strobe with TTL functionality.
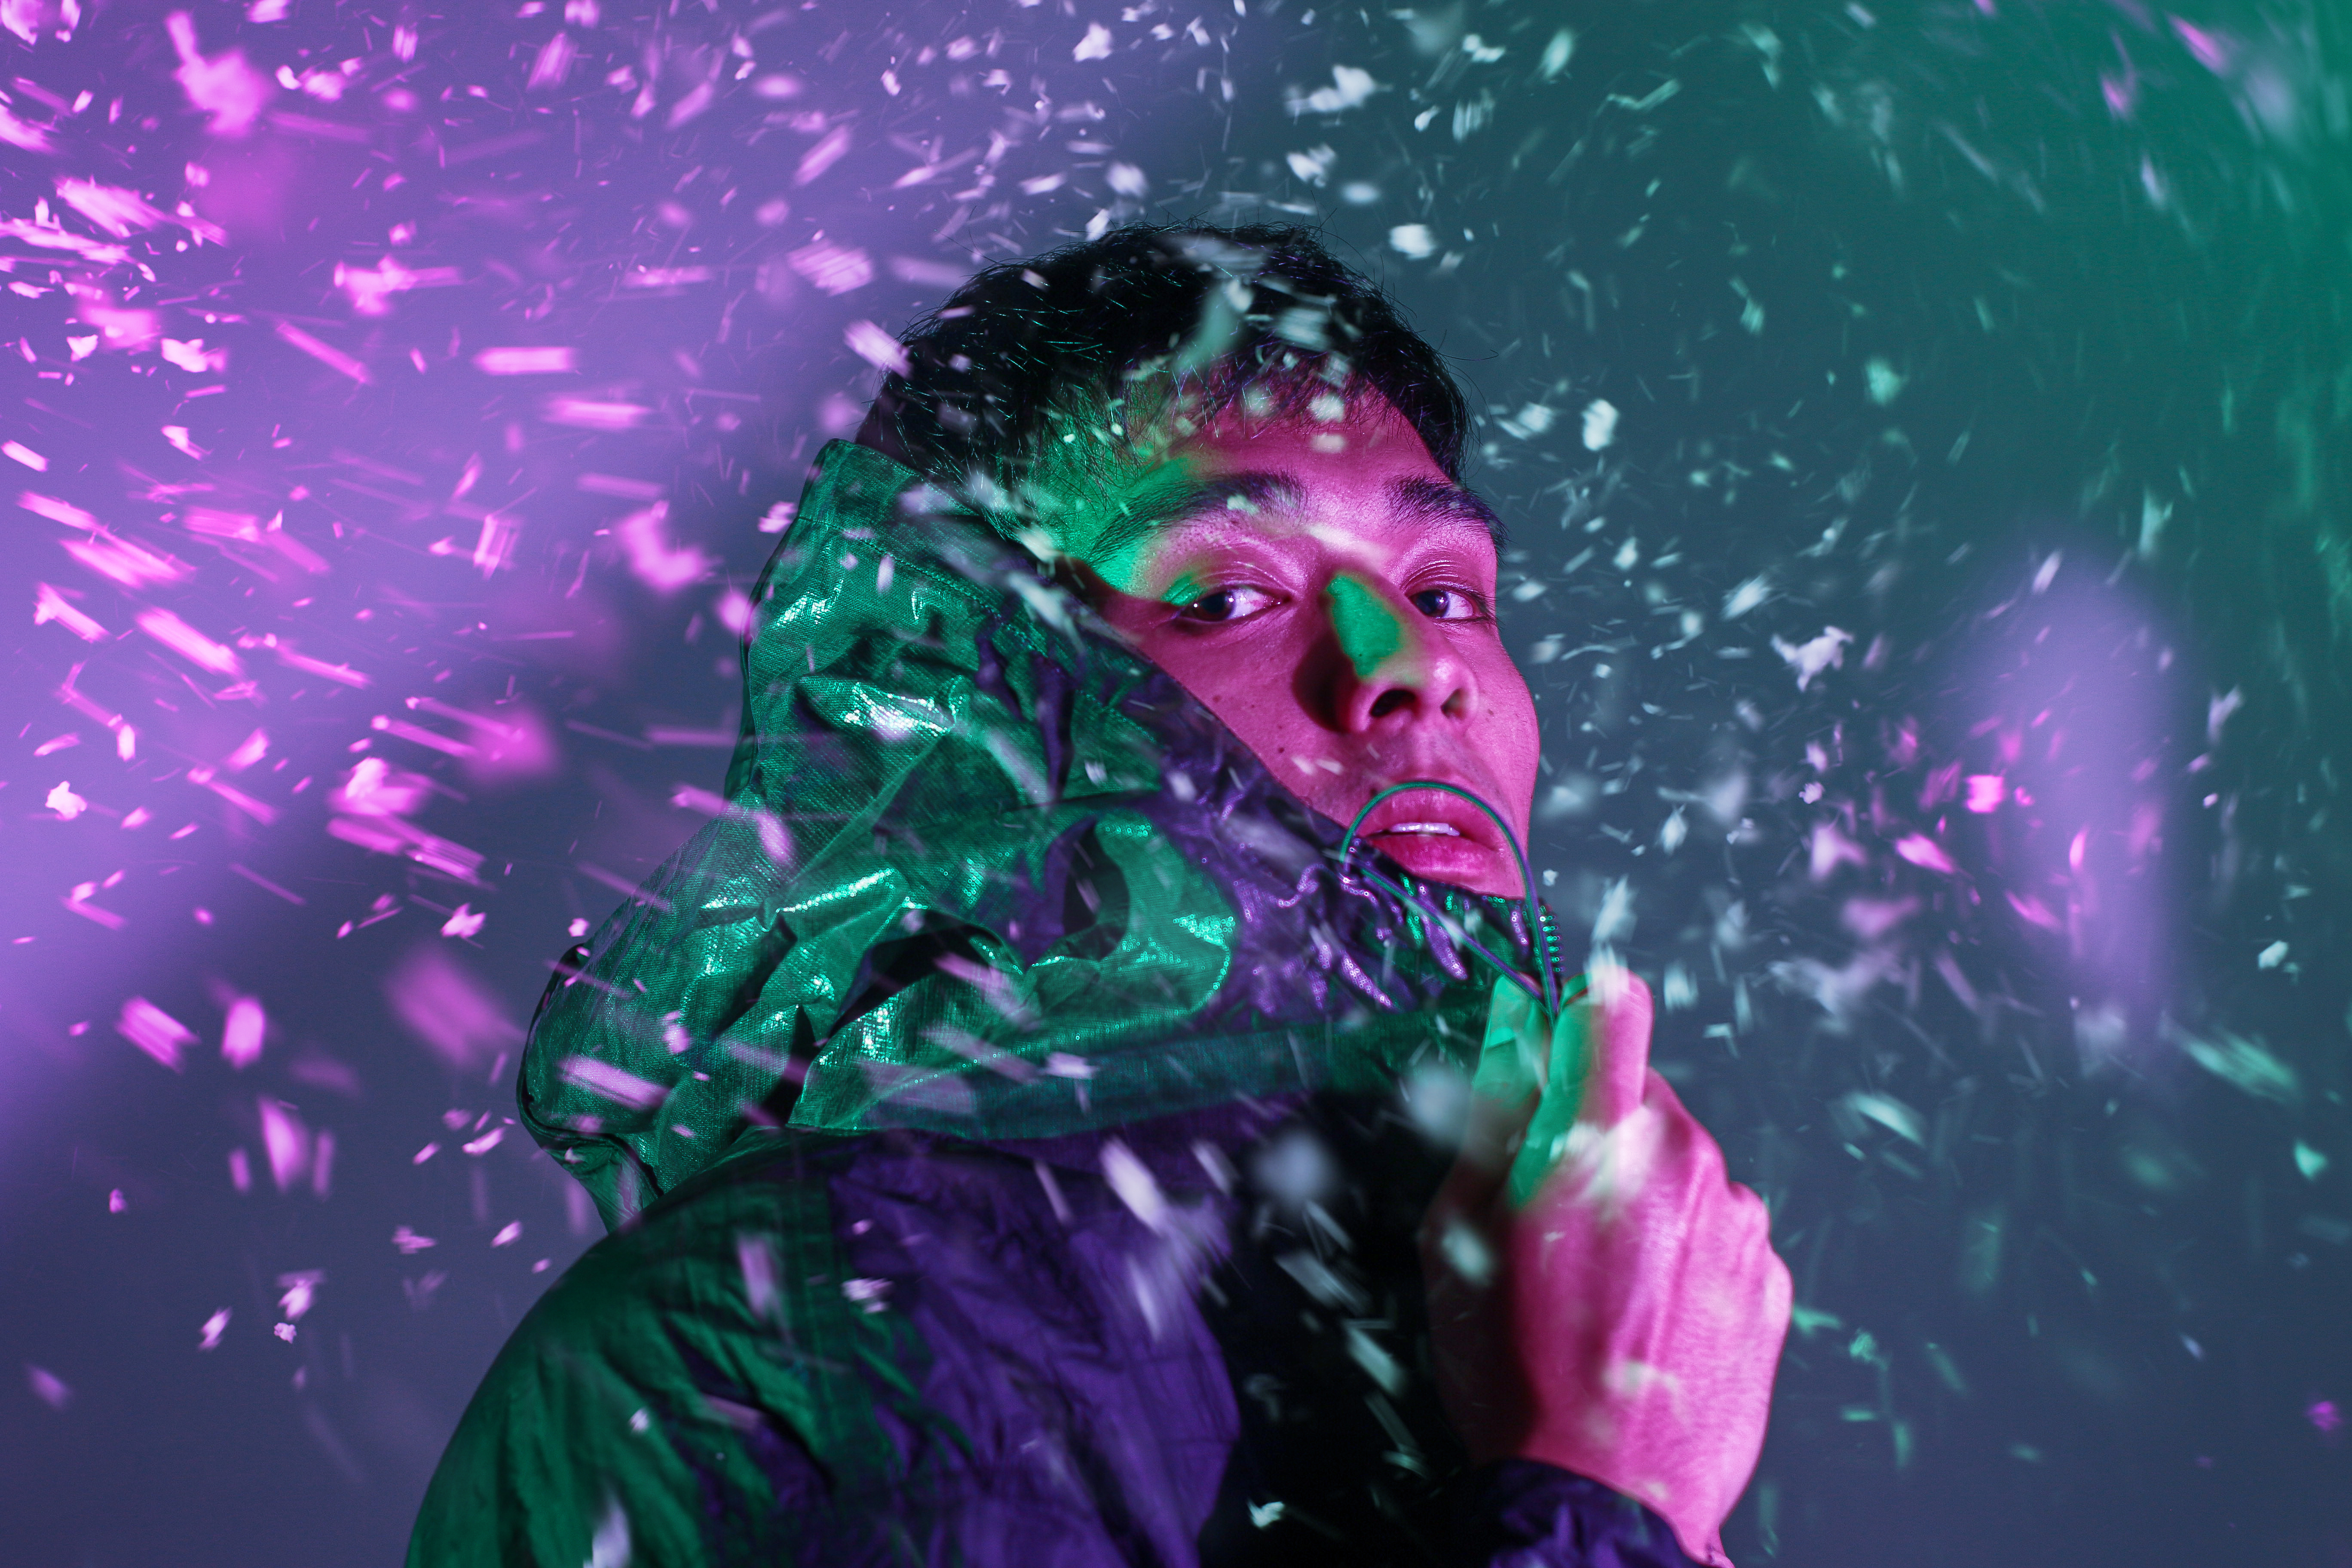
I usually set up one of my strobes inside a Godox 18×18-inch softbox to really soften out my primary light, and use the second flash as a backlight.
See how I used the Godox TT600 with the 18″x18″ softbox in a single-flash setup to create a soft, uniform light?

How I set up for a Portrait Photography Shoot
Now we’ve got all the equipment, here’s how I get it working seamlessly to enable smooth and snag less workflow.
After mounting the Godox X1 into the hotshoe on my camera, I turn it on. Following that, I turn on the camera itself and then the flash.
I’ve used this equipment a few times already, so your first time will require a little extra setup to get the all the pieces to communicate properly. It’ll be a case of switching your Godox Speedlite into slave mode and selecting the same channel as your X-1 transmitter. The process is the same for multiple Speedlite flashes, just make sure they’re all on the same channel. You can assign each flash to a different group to control them independently.
After that, it’s as simple as turning it all on in the correct order and it will all sync up each time. The best part is you can now control all the flashes from your X-1 transmitter so you don’t need to go running over to your flashes to change the power.
This keeps my workflow really smooth and means that I can control almost everything directly from my camera.
Tell me about your Portrait Photography setups!
Is there anything I’ve missed in my photography setup that you couldn’t do without? Or perhaps there’s some kit here you are thinking of adding to your setup?
Whatever the case, I’d love to hear about it!

Leave a comment